Tech Service repairs Hansa ovens in Astana: a technician arrives at your home within 60 minutes anywhere in the city, or the work is done at our service center. Diagnostics are free, the technician gives you the price after diagnostics, and there is a 1-year warranty on labor and parts. Our technicians have 4 to 20 years of experience, and you can pay via Kaspi QR, Kaspi Red, bank card, cash, or bank transfer for companies.
Why a Hansa oven won't heat and how Hansa oven repair shows up
The same symptom in Hansa ovens can come from different components. No heat — but the cause might be the heating element, the thermostat, or the wiring. A test tells them apart, not a guess.
The oven doesn't heat up or won't turn on, but the light works
- Upper and lower heating elements: each heats in its own mode, and if a coil breaks, only the working one heats.
- Thermostat: opens the circuit when the set temperature is reached, and if the contacts stick, the heat stops.
- Mode selector switch: switches the right heating element, and burnt contacts cut power to the circuit.
- Oven light: on a separate circuit, so its working doesn't tell you anything about the control board.
- Control board: sends the command to heat, and it's checked after the heating element and thermostat are confirmed good.
- Relay on the board: found in models with electronics, and a stuck contact cuts power to the coil.
Heats unevenly, burns on one side, or the grill doesn't work
Uneven heat in a Hansa oven is caused by the convection fan or a worn door seal, not a "weak" heating element, and we check both before replacing the coil. The convection fan distributes hot air evenly: if the fan blade is stuck or the motor winding is broken, heat goes to one side. When the door seal loses its elasticity, it lets air out — that's why the edge of the baking sheet burns and the center stays undercooked. If the grill doesn't work but the regular mode holds temperature, the problem is in the separate grill coil — it's tested independently of the upper and lower elements. Models with a rotisserie also need the drive checked. Hansa oven repair in Astana starts with the same component-by-component check. Before replacing the coil, we blow out the convection channels to remove carbon buildup — clogged holes give the same picture as a faulty fan.
The oven trips the breaker in the panel
When the breaker trips as you turn on the oven, it points to a fault in the heating circuit or wiring, and it's best not to turn the appliance on until a technician checks it. One culprit is a heating element with insulation breakdown to the body: as it heats up, it shorts to ground and the protection trips. Less often, the cause is worn wiring, a burnt terminal block, or moisture on the contacts after washing. Diagnostics start with testing the coils for insulation resistance and inspecting the connections. Turning the oven back on "just to try" after the breaker trips is the worst thing you can do: a faulty coil or wiring keeps heating when power is restored, and a short to ground becomes dangerous. If the protection trips as soon as you turn the mode knob, the fault is almost certainly in that heating element's circuit.
Hansa oven error codes and what Hansa oven repair means
The code on the display is a hint, not a verdict: it narrows down the components, but only a multimeter test confirms the cause. Here's how to read the control board signals and what's behind them.
How to read an error code on a Hansa oven display
The error code on a Hansa oven is shown by the control board based on sensor signals, and we read it together with the symptom — a code without the appliance's behavior gives only half the picture. The electronics process the temperature sensor readings and the heating circuit resistance, compare them with the operating range, and when out of bounds, show a combination of letters and numbers on the display. Note when the hint appeared: during turn-on, during preheat, or while the grill is on. Then the technician tests the circuit with a multimeter and compares the resistance with the norm for that specific model — different Hansa series have different values. The same code appears for a faulty sensor and for a good one with a broken circuit — that's why the technician tests the circuit instead of replacing parts blindly.
What typical codes mean and which component to check
| Code group | What it indicates | Which component to check | What the technician does |
|---|
| Temperature sensor | Open or short circuit in the sensor circuit | Sensor and its connector | Continuity test, compares resistance with the norm |
| Heating circuit | No response from the heating element | Heating element and connecting wires | Checks the coil and contacts with a multimeter |
| Control board | Signal processing failure | Board and ribbon cables | Inspects contacts, checks power circuits |
| Thermostat | Switching threshold is off | Thermostat and switching unit | Continuity test of both components separately |
Oven won't turn off and overheats: thermostat or relay
If a Hansa oven won't turn off and overheats, we check the thermostat and relay separately: the first regulates temperature, the second switches power to the heating element. The thermostat reads the temperature from the cavity and opens the circuit when the set threshold is reached, while the switch supplies and cuts voltage to the heating element on command from the control board. Both components can cause the "heats non-stop" symptom, but in different ways: stuck contacts keep the heat on constantly, while a "too high" threshold prevents timely shutoff. The technician tests the contacts for sticking, checks operation, and only then decides which component to replace. Sticking and a "too high" threshold produce a similar symptom but are fixed differently — that's why the part is replaced only after testing both.
How a technician finds the cause of a Hansa oven breakdown
Diagnostics is a sequence of checks from simple to complex, not random part replacement. This way we get to the cause without unnecessary work and without parts "just in case."
How to tell a faulty heating element from a thermostat
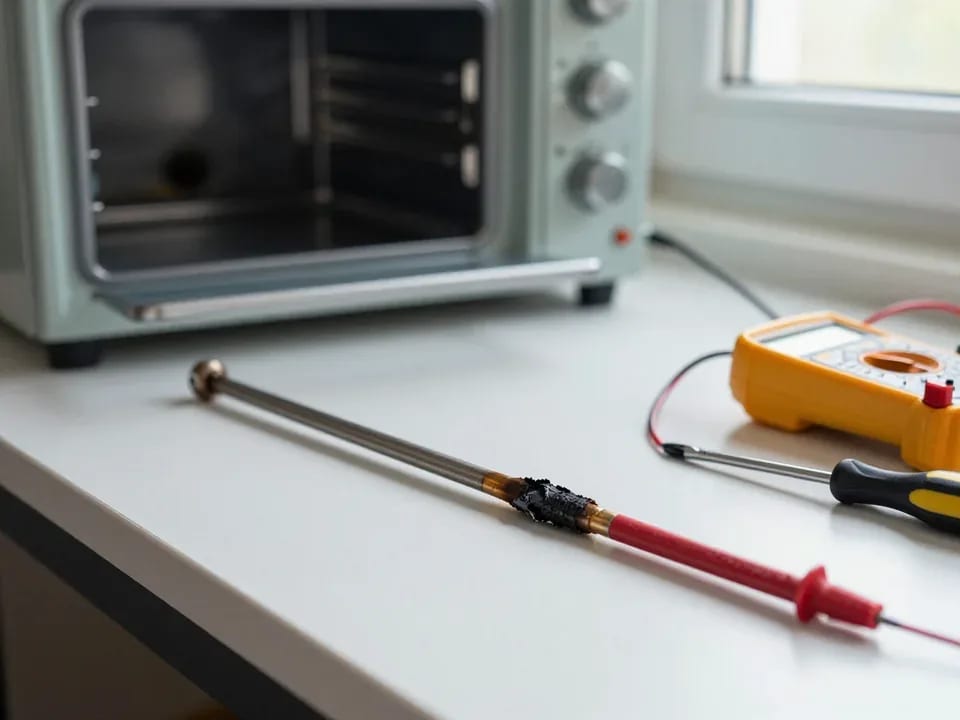
We distinguish the heating element from the thermostat by continuity testing: for the heating element we check the coil integrity and resistance with a multimeter, for the thermostat we check contact opening and closing as temperature changes. First we measure resistance at the heating element terminals: a broken coil is immediately visible, while partial damage shows up as increased resistance. Then we test the thermostat: contacts should click when heating and cooling, and the mode switch should switch circuits without drops. At the same time we inspect terminals and wiring for burnt areas — an oxidized contact gives the same symptoms as a dead heater. If the heating element coil is intact but there's no heat, the cause may be the thermostat or mode switch — replacing the heating element in this case is pointless and only masks the real fault.
What free diagnostics includes and when the cost is quoted
- Inspection and continuity testing: we test heating elements, thermostat, mode switch, and wiring with a multimeter.
- Identifying the cause: based on measurements and inspection, we determine which component failed and why.
- Agreeing on the scope: the client learns what exactly will be replaced and what work is planned before it starts.
- Cost after diagnostics: we quote the cost of work once the cause is established, not before inspection.
- Right to refuse: before work begins, the client can decline further steps if the proposed scope doesn't suit them.
- Agreement before work: the technician states the scope and cost after free diagnostics, before work begins.
How the repair and post-replacement check are done
After replacing the component, we check the adjacent parts and the heating in operating mode to make sure the cause is fixed, not just the symptom masked. We install the new part, tighten the terminals and test the circuit again, then turn on the oven and monitor it reaching the set temperature and the thermostat switching off. We also inspect the mode switch and the wiring near the replaced part — a burnt relay contact shows up as soon as a working element is installed. Checking adjacent parts is what separates a proper repair from a simple part swap: a new heating element won't help if the cause was a burnt relay contact. We provide a 1-year warranty on labor and parts, so the full cycle is done, not just a check that it heats up.
Hansa gas oven won't ignite or goes out
Gas models have their own parts — the burner, thermocouple and piezo igniter — and the symptom "won't ignite" or "goes out" points to a specific one.
Oven won't ignite: what we check first
If a Hansa gas oven won't ignite, we check the piezo igniter and the gas supply to the burner, then the condition of the burner itself. The piezo element clicks and produces a spark at the electrode, the shut-off mechanism opens the flow when the knob is pressed, and the burner nozzles feed the mixture into the combustion chamber. Nozzle holes clogged with grease or a shifted ignition electrode break this chain: the spark jumps past, the mixture doesn't ignite, and the knob returns to its original position. On gas models in the lineup we also check the thermocouple's position relative to the flame — it often gets shifted during reassembly after cleaning. Another cause is a weak contact in the piezo igniter wire: you hear the click, but the discharge goes to the body instead of the electrode. A spark without gas and gas without a spark are different faults, and you can't tell them apart from the single symptom "won't ignite" without inspecting the parts.
Oven goes out a few seconds after ignition
Flame extinction a few seconds after ignition is most often caused by the thermocouple, which doesn't confirm the flame and cuts off the gas supply. The thermocouple junction is heated by the flame and generates a signal that keeps the supply open; if there's no signal, the safety system shuts off the gas within a few seconds — that's how the leak protection works. A worn junction, carbon buildup on it, or it being shifted away from the flame produces exactly this symptom: the flame lights, but the safety system "doesn't see" it. Another possible culprit is the shut-off valve, which doesn't hold its position when the knob is released. The thermocouple is a wear part, and replacing it often restores ignition, but this valve is only checked once the thermocouple is ruled out. We first check how the burner responds as the junction heats up, rather than replacing parts at random.
Hansa oven repair at home, timelines and warranty
We repair Hansa ovens in Astana either at your home or at our service center, and the terms are the same: free diagnostics, 1-year warranty on labor and parts.
Can a Hansa oven be repaired at home?
- Most breakdowns: fixed right at your home — a technician arrives within 60 minutes anywhere in the city.
- Diagnostics and repair: handled by one visiting technician, so you don't need to take the appliance to the service center and back.
- Typical on-site replacements: heating element, thermostat, temperature sensor, mode switch, door seal.
- When service center is needed: certain cases with gas automation or the body that require disassembling the unit.
- Post-repair check: the oven is turned on, run through the modes and checked for heating before the request is closed.
What warranty covers repair and parts?
We provide a 1-year warranty on labor and parts for Hansa oven repairs — the same term for both. If a part fails within that period, it's covered under warranty, not at the customer's expense. That's why a parts warranty separate from labor matters: the owner doesn't pay twice for the same fault. Technicians with 4 to 20 years of experience install components so that the root cause is fixed, not just masked. A one-year warranty on the part removes the risk of a repeat visit. On a follow-up call, the technician checks the exact component that was replaced last time. This saves the owner time: no need to go through the whole diagnostic cycle again — just confirm that the replaced unit is working normally and holding the set temperature.
Rare Hansa models and sourcing parts
- Identifying the component: for rare models, the technician finds the part by the rating plate and the condition of the component, not by guesswork.
- Model when you call: having the model number speeds up sourcing — it shows which component is fitted to your version.
- Compatibility: we select replacements for the specific modification; a part from a neighboring series may not fit properly.
- Repair instead of replacement: on rare series, it's sometimes more cost-effective to restore the unit than to hunt for a discontinued component.
- Gas and electric: we service Hansa electric ovens and gas ovens; parts sourcing differs by type of unit.
What to do before the technician arrives and when it's dangerous
There's not much you can do before the technician arrives, but these steps matter for safety and for an accurate service request. Let's go over what you can check yourself, when you shouldn't turn the appliance on, and how to decide whether an old model is worth repairing.
What to check yourself without taking the oven apart
- Power: make sure the plug is firmly in the socket and the circuit breaker in the panel isn't tripped.
- Mode selector: turn it through all positions and note whether heating comes on.
- Oven light: if the light works but there's no heat, the problem is in the heating circuit.
- Error code: write down the characters on the display or take a photo — this narrows down the possible components.
- Symptom: describe whether the appliance heats on one side only, clicks, or shuts off after a minute.
When the breaker trips and it's dangerous
If the oven trips the breaker, don't turn it back on until a technician has inspected it — this points to a fault in the heating circuit or the wiring. The circuit breaker in the panel protects the line from overheating and fire: it opens the circuit when current exceeds the rating, not for no reason. A common cause is a short or leakage in the heating element, less often damaged wire insulation or moisture on contacts after washing. Turning it back on sends current through the faulty circuit and heats up connections, so it's best to leave the breaker off. If the line holds the load after the oven is disconnected, the appliance itself is the culprit, and an inspection will show which component is leaking. A tripped breaker is a sign that the problem is in the appliance, not a "weak breaker."
Repair an old Hansa oven or replace it
- Heating element or thermostat: replacing these components is justified even on appliances that have been in use for a long time — they aren't tied to the electronics.
- Control board: a faulty board on an old model can sometimes make repair impractical due to the complexity of the unit.
- Look at the component, not the age: compare the cost of the part with the remaining life of the appliance, not the year of manufacture.
- Diagnostics as the basis: the technician quotes a price after free diagnostics, and that shows which option is more cost-effective.
- Gas oven: here the decision also depends on the condition of the gas automation, not just the heating.
How Hansa oven repair saves your appliance
Here's what we most often explain to Hansa oven owners: how to read a symptom, what confirms an error code, and in what order to work toward the cause.
- Symptom "not heating": in a Hansa oven, different components can cause this, and testing the heating element, thermostat, and relay tells them apart—not guesswork.
- Error code on the display: narrows down the components, but a multimeter circuit check ultimately confirms the cause.
- Uneven heating: is more often related to convection or the door seal, not weak heating as such.
- Gas oven: goes out after ignition due to the thermocouple, and won't light due to the igniter or gas supply.
- Breaker tripped: don't turn the appliance on before inspection, and the cost of work is confirmed after free diagnostics.